lash lift kit instructions
Lash lift kits are innovative beauty tools designed to enhance your natural lashes without extensions. They offer a convenient at-home solution for achieving beautifully lifted, curled lashes with professional results.
What is a Lash Lift?
A lash lift is a cosmetic treatment that enhances the natural shape of your eyelashes by curling and lifting them from the root. Unlike lash extensions, it focuses on boosting your existing lashes without adding artificial ones. The process involves placing a silicone pad under your lashes and applying specialized solutions to create a permanent curl. This procedure is semi-permanent, lasting several weeks, and results in a luscious, voluminous look. At-home lash lift kits replicate this salon treatment, offering a convenient way to achieve professional results. The treatment is ideal for those seeking a low-maintenance, natural alternative to mascara or extensions, saving time on daily beauty routines while enhancing lash appearance.
Benefits of Using a Lash Lift Kit
Using a lash lift kit offers numerous advantages for achieving stunning, lifted lashes. It provides a cost-effective alternative to salon treatments, allowing you to enjoy professional results from home. The kit includes everything needed for the procedure, ensuring convenience and ease. Lash lift kits enhance the natural curl and length of your lashes, creating a voluminous look without extensions. They are time-saving, as the results last several weeks, reducing the need for daily mascara. Additionally, the process is relatively quick, with most applications completed in under an hour. The kits are designed for safety, with gentle formulas suitable for sensitive eyes. Overall, a lash lift kit is an excellent choice for those seeking a low-maintenance, long-lasting beauty solution.
Preparation for the Lash Lift Procedure
Preparation is essential for a successful lash lift. Cleanse your lashes with an oil-free cleanser to remove makeup and oils. Choose the correct shield size for your eye shape and lash length, ensuring a comfortable fit. Brush your lashes to align them properly, preventing tangles and ensuring even lifting. A well-prepared lash area guarantees better adhesion and results.
Step 1: Cleaning Your Lashes
Cleaning your lashes is the first and most crucial step in a lash lift procedure. Use an oil-free makeup remover or the cleanser provided in your kit to gently remove all traces of makeup, oil, and impurities. Pat your lashes dry with a clean towel to ensure no moisture remains. This step ensures the adhesive and solutions adhere properly, avoiding any interference from residue. Properly cleaned lashes will yield better lift and longer-lasting results, making this step indispensable for a successful procedure. Take your time to thoroughly cleanse the area to achieve the best outcome.
Step 2: Choosing the Right Shield Size
Selecting the correct shield size is essential for achieving the desired lash lift and ensuring comfort. Each lash lift kit typically includes multiple shield sizes to accommodate different eye shapes and lash lengths. Measure your natural lash length against the shields to determine the best fit. A shield that is too small may not support all lashes, while one too large can cause discomfort. Gently place the shield against your upper lash line to test the fit. Proper sizing ensures that all lashes can be lifted uniformly, contributing to a professional-quality finish. This step sets the foundation for the rest of the procedure, so take care to choose accurately for optimal results. Shields should lie comfortably without causing strain or overlapping excessively.
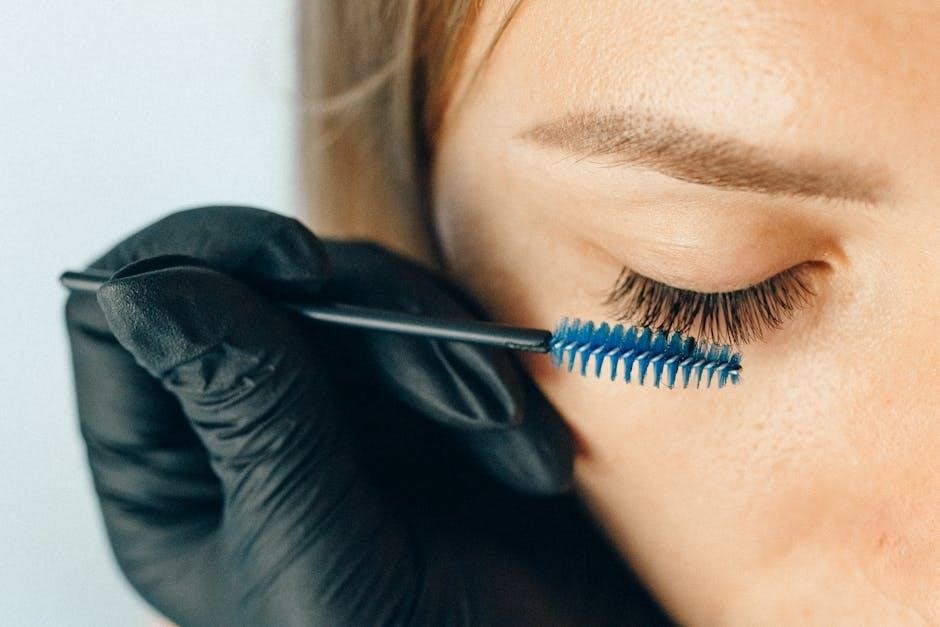
Step 3: Brushing Your Lashes
Brushing your lashes is a crucial step to ensure they are aligned and prepared for the lash lift. Using a spoolie or a clean mascara wand, gently sweep your lashes from the root to the tip. This helps remove any tangles and ensures even distribution of the lifting solution. Pay special attention to the outer corners, where lashes tend to be less cooperative. Brushing also helps identify any stray lashes that may need extra attention during the procedure. Be patient and thorough, as this step ensures your lashes will lift evenly and achieve the desired curl. Proper brushing sets the foundation for a professional-looking result and prevents any lashes from sticking together during the process.
Applying the Silicone Pads
Applying silicone pads involves selecting the right size, applying adhesive, and securing them close to your lashes for optimal lift and alignment.
Step 4: Placing the Silicone Pad
To place the silicone pad, start by selecting the appropriate size for your eye shape. Apply a small amount of adhesive to the back of the pad and position it close to your natural lash line. Gently press the pad onto your eyelid, ensuring it adheres securely. Hold the pad in place for a few seconds to allow the adhesive to set. Make sure the pad is centered and aligned with your lashes for even lifting. If necessary, adjust the pad slightly for comfort and proper alignment. This step is crucial for achieving the desired lift and shape of your lashes.
Step 5: Securing the Lashes with Adhesive
Once the silicone pad is in place, apply a thin layer of adhesive to the base of your lashes using the applicator provided. Gently press your lashes onto the pad, starting from the inner corner and working outward. Ensure each lash adheres evenly to the pad for optimal results. Hold the lashes in place for a few seconds to allow the adhesive to set properly. Avoid applying too much adhesive, as it may cause clumping or irritation. Properly securing your lashes to the pad is essential for achieving the desired lift and curl. Let the adhesive dry completely before proceeding to the next step.
Pro Tip: Use a light touch to guide stray lashes into place for a more uniform look.
Pro Tip: Handling Stray Lashes
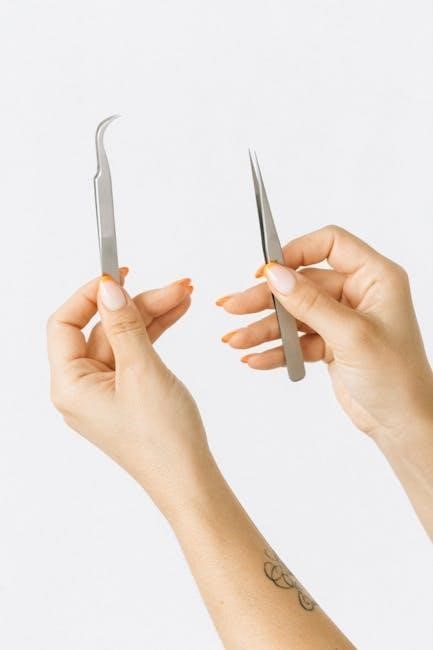
Stray lashes can disrupt the uniformity of your lash lift. To manage them, use a fine-tip tweezer or the tool provided in your kit to gently guide these lashes onto the silicone pad. Dip the tweezers in a small amount of adhesive and carefully place the stray lashes alongside the others. Ensure they align with the natural direction of your lashes to maintain a seamless look. For particularly stubborn lashes, lightly press them onto the pad with the tweezers. This step ensures all lashes are evenly lifted, enhancing the overall result. Patience is key here, as proper alignment will make your lashes appear fuller and more defined.
The Lifting Process
The lifting process involves applying the lifting solution to your lashes to create the desired curl and shape. Follow the kit instructions for application and timing. After applying the solution, wait the recommended time before rinsing. Next, apply the neutralizing solution to stop the lifting process and restore lash health. Ensure proper timing to avoid over-processing. Use a cotton swab to gently remove excess solution. Rinse thoroughly with water to complete the process. Proper technique and timing are crucial for achieving the best results and maintaining lash integrity.
Step 6: Applying the Lifting Solution
Once the lashes are secured, carefully apply the lifting solution using the provided brush; Start at the root and work towards the tips, ensuring even coverage. Avoid getting the solution in your eyes. The solution works to break down the lash structure, allowing them to take the new shape. Follow the kit instructions for the recommended processing time, typically between 5 to 15 minutes, depending on desired results. After the processing time, gently wipe away the solution with a damp cotton swab. Proper application and timing are crucial for achieving the perfect lift without damaging your lashes. Always follow the instructions provided with your specific kit for best outcomes.
Step 7: Processing Time for the Lifting Solution
After applying the lifting solution, allow it to process for the recommended time, usually between 5 to 15 minutes, depending on your kit instructions. During this time, the solution works to reshape your lashes into the desired lifted form. It’s important to wait patiently and avoid rushing this step, as it directly impacts the final result. Over-processing can damage your lashes, while under-processing may not achieve the desired lift. Keep an eye on the timer and ensure you rinse or neutralize the solution exactly as instructed. Proper processing time is key to achieving long-lasting, beautifully lifted lashes without causing harm. Always follow the guidelines provided with your kit for optimal results.
Step 8: Applying the Neutralizing Solution
Once the lifting solution has processed, carefully apply the neutralizing solution to your lashes using a clean cotton swab or applicator. This step is crucial as it halts the chemical process and restores balance to your lashes. Gently pat the solution along the lash line, ensuring full coverage. Allow it to sit for the recommended time, usually 1-2 minutes, before rinsing thoroughly with clean water. This step helps to close the cuticle and lock in the lift, leaving your lashes healthy and vibrant. Always follow the kit instructions for the exact duration and application method to achieve the best results and maintain lash health.
After the Lifting Process
Post-lift care involves gently removing silicone pads and cleansing lashes to remove any residue. This ensures the lashes remain healthy and the lift lasts longer naturally.
Step 9: Removing the Silicone Pads
After completing the lifting and neutralizing process, carefully remove the silicone pads from your eyelids. Gently peel the pad from the outer corner, working your way inward to avoid pulling or tugging on the lashes. If the pad feels stuck, dampen it with a cleanser or water to loosen the adhesive. Once removed, inspect your lashes to ensure no residue remains. Use a lint-free wipe or cotton swab to clean any excess solution or adhesive. This step is crucial for maintaining lash health and ensuring the lift holds properly. Follow with a conditioning treatment to hydrate your lashes and complete the process.
Step 10: Cleaning the Lashes Post-Procedure
After removing the silicone pads, clean your lashes thoroughly to eliminate any residual solutions or adhesives. Use an oil-free cleanser or the one provided in your lash lift kit, gently wiping from the base to the tip. Avoid using waterproof or oil-based products, as they can weaken the lift. Pat the area dry with a clean towel to prevent moisture buildup. This step ensures your lashes remain healthy and the lift stays intact. Proper cleaning also helps prevent irritation and maintains the appearance of your newly lifted lashes. Follow this step diligently to achieve the best results from your lash lift treatment.

Additional Steps for Enhanced Results
For enhanced results, consider additional steps like tinting your lashes for a darker, more dramatic look and conditioning to keep them healthy and strong.
Step 11: Tinting Your Lashes (Optional)
Tinting your lashes is an optional enhancement that can add depth and drama to your lash lift. After completing the lift, apply the tinting solution evenly to your lashes using the provided brush. Processing times vary, but typically range from 5 to 10 minutes. Rinse thoroughly with water to remove excess tint. This step is ideal for those wanting darker, more defined lashes without the need for mascara. Choose from shades like black, brown, or even subtle tones to match your natural color. The tint lasts several weeks, maintaining the vibrant results of your lash lift. For best results, follow the kit’s instructions carefully and perform a patch test before application.
Step 12: Conditioning Your Lashes
Conditioning your lashes is the final step to ensure long-lasting results and healthy lashes. Apply the conditioning serum provided in the kit gently to your lashes, focusing on the tips. This serum helps repair and moisturize your lashes, preventing dryness and breakage. Use the serum as directed, typically once daily, for optimal hydration. Proper conditioning enhances the appearance of your lashes, keeping them soft and shiny. Regular use also supports lash health, promoting strength and resilience. By incorporating this step into your aftercare routine, you can maintain the vibrant, lifted look achieved through the lash lift process. Consistency is key to enjoying your enhanced lashes for weeks to come.

Safety and Precautions
Always follow kit instructions to avoid irritation. Perform a patch test before applying any solution. Avoid getting products in your eyes. Use protective gear if necessary.
Important Safety Tips
When using a lash lift kit, prioritize your safety to avoid any adverse reactions. Always perform a patch test 24-48 hours before applying the solutions to ensure you’re not allergic to any ingredients. Avoid getting the adhesive or lifting solutions in your eyes, as this can cause irritation or discomfort. If you wear contact lenses, remove them before starting the procedure. Use protective gloves and work in a well-ventilated area to minimize exposure to strong chemicals. Follow the instructions carefully and never exceed the recommended processing times. If you experience any irritation, rinse your eyes thoroughly with water and discontinue use. Proper preparation and caution are key to a safe and successful lash lift experience.
What to Do If You Experience Irritation
If irritation occurs during or after using a lash lift kit, act promptly to minimize discomfort. Flush your eyes with clean water to remove any residual product. Discontinue the procedure immediately and avoid rubbing your eyes, as this can worsen irritation. Apply a gentle, oil-free cleanser to the affected area to remove any remaining solution. If irritation persists, consider using soothing eye drops or a cool compress to reduce discomfort. Avoid applying makeup or harsh products near your eyes until the irritation subsides. If symptoms like redness, itching, or swelling linger, consult a healthcare professional for further advice. Proper aftercare is essential to ensure your lashes and eyes recover smoothly.
Maintenance and Aftercare
Proper maintenance ensures long-lasting results. Avoid waterproof mascara, use gentle cleansers, and condition lashes regularly to keep them healthy and enhance the lift’s longevity.
Step 13: Aftercare Routine
Following a proper aftercare routine is essential to maintain the health and appearance of your lashes after a lift. Start by avoiding waterproof mascara and harsh eye products for at least 24 hours. Use a gentle, oil-free cleanser to keep your lashes clean without stripping natural oils. Regular conditioning with a lash serum or coconut oil can help keep your lashes moisturized and strong. Additionally, avoid rubbing your eyes or using excessive force when cleansing, as this can damage the lashes or reduce the lift’s effectiveness. By adhering to these simple steps, you can enjoy long-lasting, lifted lashes that look great and stay healthy.
How Long Do Lash Lifts Typically Last?
Lash lifts are a semi-permanent beauty treatment, and their duration varies depending on several factors. On average, a lash lift can last between 4 to 6 weeks, with the curl and lift gradually fading as your natural lashes shed and new ones grow. Proper aftercare, such as avoiding oily products and being gentle with your lashes, can help extend the results. Touch-ups are often needed after this period to maintain the desired appearance. The longevity also depends on the quality of the products used and the skill level of the person performing the lift, whether at home or in a salon.
Troubleshooting Common Issues
Common issues like uneven lifting or over-processing can occur. Ensure proper kit instructions are followed. If irritation happens, rinse thoroughly and avoid future use if sensitivity persists.
Common Mistakes to Avoid
When using a lash lift kit, avoid common mistakes for optimal results. Over-processing lashes can cause damage, so adhere strictly to kit instructions. Incorrect shield size selection may lead to poor lash alignment. Neglecting to clean lashes properly before application can reduce adhesive effectiveness. Applying too much adhesive or solution can irritate eyes. Forgetting to follow processing times may result in under- or over-lifting. Avoid using expired products, as they may weaken lash health. Improper removal of pads can cause lash breakage. Always follow safety guidelines to ensure a safe and successful lash lift experience. Preventing these errors ensures professional-looking results and protects lash integrity.
Solving Lash Lift Problems
If issues arise during or after a lash lift, address them promptly. For irritation, rinse eyes with water and apply a soothing product. If lashes appear over-processed, use a lash conditioner to restore moisture. To fix uneven lifts, reapply the lifting solution carefully. For weak curl, ensure proper shield placement and follow processing times. If adhesive causes discomfort, gently remove pads and clean the area. To prevent damage, avoid rubbing eyes post-procedure. For best results, follow kit instructions precisely and maintain proper aftercare. Addressing issues early ensures lash health and optimal outcomes. Always prioritize lash care to achieve the desired lifted look safely and effectively.
Lash lift kits offer a convenient, cost-effective way to achieve stunning lashes at home, saving time and money while boosting confidence with professional results.
Final Tips for Success
To ensure a successful lash lift, follow these essential tips: always clean your lashes thoroughly before starting, and choose the right shield size for your eye shape. Use a gentle touch when applying adhesive and solutions to avoid irritation. Patience is key—allow each step to process fully for optimal results. Aftercare is crucial; avoid waterproof mascara and oil-based products to maintain the lift. For stray lashes, use a spoolie to smooth them out. Finally, condition your lashes post-procedure to keep them healthy and strong. With practice, you’ll master the technique and enjoy stunning, lifted lashes that enhance your natural beauty effortlessly.
Why Lash Lift Kits Are Worth Trying
Lash lift kits are a game-changer for anyone seeking a cost-effective, low-maintenance alternative to lash extensions. They offer a convenient at-home solution for achieving professional-quality results, saving time and money. With a lash lift kit, you can enjoy beautifully curled, lifted lashes for weeks without the need for daily mascara. The kits are designed to be user-friendly, with step-by-step instructions that guide you through the process. Plus, they’re a great option for those with sensitive eyes or who prefer a more natural look. By investing in a lash lift kit, you can enhance your lashes’ natural beauty effortlessly and confidently, making it a worthwhile addition to your beauty routine.