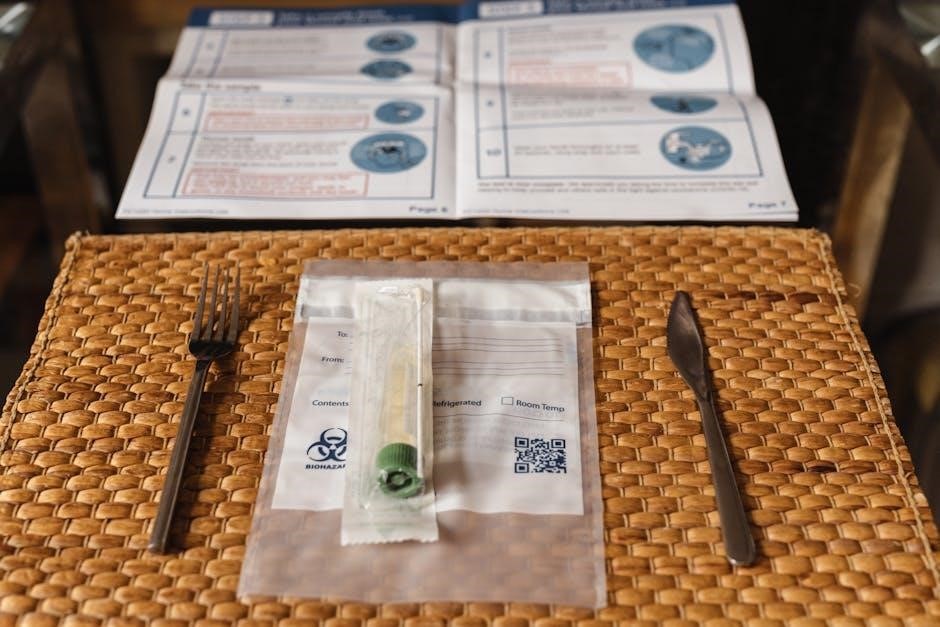
lash lift kit instructions
A lash lift kit is a DIY alternative to professional treatments, offering a convenient way to achieve curled, lifted lashes at home. Using chemical solutions, these kits enhance your natural lashes, saving time and effort compared to daily mascara application. Perfect for those seeking a low-maintenance, long-lasting beauty solution.
What is a Lash Lift Kit?
A lash lift kit is a DIY beauty product designed to curl and lift natural eyelashes at home. It typically includes a set of chemical solutions, such as perming lotion, setting lotion, and nourishing agents, along with tools like silicone pads, lash glue, and applicators. These kits are formulated to mimic professional lash lift treatments, offering a cost-effective and convenient alternative for achieving lifted, voluminous lashes without salon visits. The kit provides step-by-step instructions for safely applying the products to enhance the natural shape of the lashes, resulting in a long-lasting, curled appearance. By following the instructions carefully, users can enjoy professional-like results in the comfort of their own homes. Lash lift kits are ideal for those who want to save time on daily mascara application while maintaining a fresh, wide-eyed look.
What is a Lash Lift?
A lash lift is a semi-permanent cosmetic treatment that enhances the natural appearance of eyelashes by curling them upwards. Lasting up to eight weeks, it creates the illusion of longer, fuller lashes. Unlike lash extensions, it doesn’t require glue or false lashes. The process involves using a chemical solution to reshape the lashes, making the eyes appear wider and more awake. It’s a popular alternative to daily mascara, offering a low-maintenance beauty solution. The treatment is suitable for most lash types, including short or fine lashes. A lash lift is often confused with a lash perm but focuses on lifting rather than perming. It’s a quick, non-invasive procedure that provides natural-looking results. Ideal for those seeking a hassle-free way to enhance their lashes without regular makeup. The treatment can also be paired with tinting for added drama. It’s a modern beauty staple for effortless, lifted lashes.
Benefits of Using a Lash Lift Kit
Using a lash lift kit offers numerous benefits, making it a popular choice for beauty enthusiasts. It provides long-lasting results, typically lasting up to eight weeks, eliminating the need for daily mascara or false lashes. The kit is cost-effective compared to professional treatments, allowing you to achieve salon-quality results in the comfort of your home. Lash lift kits are also time-saving, as they require minimal effort and maintenance. The process enhances your natural lashes, creating a lifted, fuller appearance without damage. It’s ideal for those with busy lifestyles, as it saves time on daily beauty routines. Additionally, lash lift kits are versatile, suitable for various lash types, including short or fine lashes. They are a great alternative to eyelash extensions, offering a more affordable and low-maintenance solution. With proper care, the results are natural and transformative, making lash lift kits a valuable addition to your beauty regimen.
Choosing the Right Lash Lift Kit
Selecting the best lash lift kit ensures optimal results. Look for kits containing essential components like perm lotion, setting lotion, nourishing agent, and silicone pads in various sizes. Consider kits with high ratings and positive reviews, such as the Ayasal or Silksence Lash Lift Kits, which are popular for their effectiveness and ease of use. Kits offering complete sets, including applicators and timers, provide convenience. Budget-friendly options like the Silksence kit are great for beginners. Always check for thio-free formulas to minimize irritation. Ensure the kit aligns with your lash type and desired results, whether for lashes or brow lamination. Proper selection ensures a safe and successful at-home lash lift experience.
Best Lash Lift Kits Available
The market offers several top-rated lash lift kits that cater to different needs and preferences. The Ayasal Lash Lift Kit, with a 4.2-star rating on Amazon, is highly recommended for its effectiveness and versatility, working well for both lashes and brow lamination. Another excellent option is the Silksence Lash Lift Kit, known for its affordability and comprehensive inclusion of all necessary items like perm lotion, setting lotion, and nourishing oil. The Dollys Eye Lash Wave Lotion set is also popular, especially among beginners, for its ease of use and complete DIY lash lift solution. These kits are praised for their ability to deliver professional-quality results at home, making them ideal for those seeking a cost-effective and convenient beauty solution. Always opt for kits with high ratings and positive customer feedback to ensure a satisfactory experience.
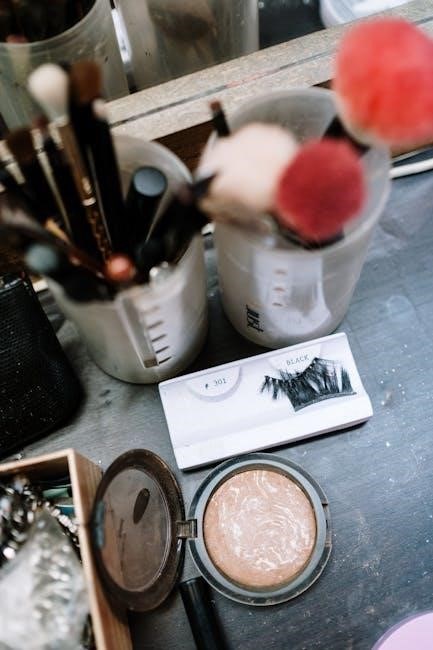
Key Components of a Lash Lift Kit

A typical lash lift kit contains several essential components designed to help you achieve professional-quality results at home. These include perming lotion and setting lotion, which work together to curl and set your lashes. You’ll also find a nourishing agent to hydrate and protect your lashes after the treatment. Lash glue is provided to secure the silicone pads, which come in various sizes to suit different lash lengths. Additional tools like a microfiber brush or applicator are included for precise application. Some kits may also include eyelash cleanser to prepare your lashes and a timer to ensure the correct processing time. High-quality kits often feature everything needed for a seamless lash lift experience, making the process easy and effective for both beginners and experienced users. These components work together to enhance your natural lashes safely and efficiently.
Things to Consider When Selecting a Kit
When choosing a lash lift kit, there are several factors to consider for the best results. Kit contents are crucial; ensure it includes perming lotion, setting lotion, nourishing agent, lash glue, and silicone pads in various sizes. Brand reputation matters, as high-quality ingredients ensure safety and effectiveness. Read reviews to assess user satisfaction and outcomes. Price is another consideration—compare kits to find one that offers value without compromising on quality. Some kits cater to specific needs, like sensitive eyes or brow lamination, so choose one that aligns with your preferences. Additionally, check if the kit includes instructional guides or online tutorials for ease of use. Considering these factors will help you select a kit that meets your expectations and delivers professional-quality results at home. Always prioritize your lash health and safety when making your decision.

Preparation for the Lash Lift Process
Proper preparation ensures a successful lash lift. Cleanse your lashes thoroughly with an oil-free cleanser and avoid using waterproof mascara or castor oil 48 hours prior. Keep lashes dry and untouched 24 hours before the process to prevent interference with the chemicals. This preparation helps the lash lift kit adhere effectively and achieve optimal results.
Preparation Steps Before Using the Kit
Before using a lash lift kit, ensure your lashes are clean and free of makeup, oils, or lotions. Avoid waterproof mascara and castor oil for at least 48 hours prior to the treatment. Gently cleanse your lashes with an oil-free cleanser to remove any residue. Dry your lashes thoroughly to ensure the adhesive works effectively. It’s also important to avoid getting your lashes wet or applying harsh products 24 hours before the process. This preparation helps maximize the results of the lash lift and prevents any potential irritation. Properly preparing your lashes ensures the glue and chemical solutions adhere and work effectively, leading to a successful lash lift. Timing and consistency are key to achieving the desired outcome.
Items You May Need That Are Not Included
While lash lift kits typically include essential components like glue, silicone pads, perming lotion, and nourishing agents, some additional items may be necessary for the best results. A microfiber brush or pad can help apply solutions evenly. Cotton swabs are useful for cleaning excess glue or lotion. A timer is essential to monitor the treatment duration accurately. An oil-free cleanser is recommended to prepare your lashes before application. Some users also find a lifting tool helpful to guide lashes onto the silicone pads. Having these items ready ensures a smoother process and better outcomes. While the kit provides the basics, these extra tools enhance precision and comfort during the lash lift treatment.
How to Choose the Correct Silicone Pad Size
Selecting the right silicone pad size is crucial for a successful lash lift. To determine the correct size, place the pad on your upper eyelid as close to the lash line as possible. Use a lifting tool to gently bend your lashes over the pad. The pad should fit comfortably, with your lashes lying flat against it. If the pad is too small, it may not support all your lashes, while a pad that’s too large could cause discomfort. Choose a size that aligns with your lash length: shorter lashes require smaller pads, medium lashes a medium size, and longer lashes a larger pad. Proper fit ensures even lifting and prevents damage. Testing the pad size before applying any solutions is essential for achieving the best results.

Step-by-Step Instructions for Using a Lash Lift Kit
Using a lash lift kit involves applying glue, placing silicone pads, and applying perming lotion, setting lotion, and nourishing agents in sequence. Follow the instructions carefully for best results.
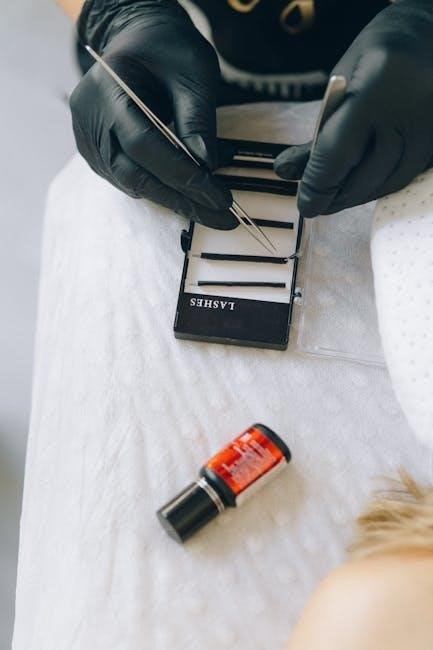
Gathering and Organizing Your Supplies
Before starting the lash lift process, ensure all necessary items are within reach. Your kit typically includes lash lift glue, silicone pads, perming lotion, setting lotion, and a nourishing agent. Additional tools like a microfiber brush, applicators, and a timer are essential.
- Place each product on a clean, stable surface for easy access.
- Check expiration dates and instructions for proper usage.
- Prepare cotton swabs and an oil-free cleanser (if not included) to clean the eye area beforehand.
Organizing your supplies beforehand ensures a smooth, stress-free application process. This step is crucial for achieving professional-like results at home.
Applying the Lash Lift Glue
Applying the lash lift glue is a critical step in the process. Start by ensuring your eyes are clean and free of makeup or oils, using an oil-free cleanser to prepare the area.
- Using the provided applicator or a microfiber brush, apply a thin layer of glue to the back of the silicone pad.
- Avoid applying too much glue, as it may cause the pad to shift during placement;
- Position the pad on your upper eyelid, aligning it closely with your natural lash line for the best results.
- Gently hold the pad in place for a few seconds to ensure proper adhesion.
Allow the glue to set according to the instructions before proceeding. Avoid touching the area once the glue is set to maintain the pad’s position and ensure even curling.
If glue gets on unwanted areas, carefully clean it with a cotton swab dipped in cleanser without disturbing the pad.

Placing the Silicone Pads
Placing the silicone pads correctly is essential for achieving the desired lash lift. Choose the appropriate pad size based on your lash length and the level of curl desired. Apply a thin layer of glue to the back of the pad.
- Gently position the pad on your upper eyelid, aligning it closely with your natural lash line.
- Use a lifting tool to carefully bend your lashes over the pad, ensuring they lie flat against it. Avoid overlapping or twisting the lashes.
- Hold the pad in place for a few seconds to secure it. Once set, the pad should feel comfortable and not shift during the process.
If the pad feels uncomfortable or misaligned, adjust it slightly before the glue sets. Proper placement ensures even curling and optimal results. After positioning, proceed with the perming lotion application as directed.
Applying the Perming Lotion
After securing the silicone pads, gently dip a cotton swab into the perming lotion. Carefully sweep the swab from the base to the tip of your lashes, ensuring even coverage without touching the skin or eyes. Avoid excessive application to prevent irritation.
- Allow the lotion to process for the recommended time, typically 5-10 minutes, depending on desired curl intensity.
- Keep the area well-ventilated and avoid rubbing your eyes during this step.
- Once the timer goes off, proceed to the next step by applying the setting lotion to neutralize the perming solution.
Remember, proper application and timing are crucial for achieving the desired curl without causing damage or discomfort.
Applying the Setting Lotion
After the perming lotion has processed, it’s time to apply the setting lotion. Dip a clean cotton swab into the solution and gently sweep it across your lashes, starting from the base and moving toward the tips.
- Ensure even coverage, but avoid touching the skin or eyes to prevent irritation.
- Allow the setting lotion to work for the recommended 5 minutes to neutralize the perming solution.
- Do not overprocess, as this can cause dryness or damage to your lashes.
Once the timer is up, carefully remove the silicone pads and rinse your eyes with water if needed. This step is essential to lock in the curl and prepare your lashes for the nourishing agent.
Applying the Nourishing Agent
After removing the silicone pads, apply the nourishing agent to your lashes using a clean cotton swab or spoolie. This step is crucial for hydrating your lashes and restoring moisture after the chemical treatments.
- Gently sweep the agent from base to tip, ensuring full coverage without touching the skin.
- Allow it to absorb fully before proceeding or applying any makeup.
- This step helps to repair and protect your lashes, leaving them soft and healthy-looking.
Do not rinse your lashes after applying the nourishing agent. Instead, let it work naturally to replenish moisture and strengthen your lashes. This final step ensures long-lasting results and maintains lash health.
Timing and Monitoring the Process
Timing is crucial during the lash lift process to ensure optimal results and avoid over-processing. Typically, the perming lotion is left on for 5-10 minutes, while the setting lotion is applied for 5 minutes. Use a timer to keep track accurately.
- After applying the perming lotion, monitor the curl formation. Over-processing can damage lashes, so stay within the recommended time frame.
- Check the lashes periodically by gently lifting the silicone pad without touching the lashes themselves.
- If you notice excessive curl or discomfort, remove the pads immediately, even if the timer hasn’t gone off.
Proper timing ensures your lashes achieve the desired lift without harm. Adjust the duration based on your lash type, following the kit’s instructions for best outcomes.
Removing the Silicone Pads
After the processing time has elapsed, carefully remove the silicone pads from your eyelids. Gently peel the pad from the outer corner, moving inward to avoid pulling on your lashes. If the pad adheres strongly, dampen a cotton swab with water and glide it under the pad to loosen the glue.
- Avoid yanking or pulling forcefully, as this could damage your lashes or cause discomfort.
- Once removed, inspect the area for any remaining glue or residue and clean it with a damp cloth if necessary.
- After removal, refrain from touching your lashes excessively to allow the treatment to set properly.
Proper removal is essential for maintaining the health of your lashes and ensuring the best results from your lash lift.

Aftercare and Maintenance
Proper aftercare ensures long-lasting results and maintains lash health. Avoid waterproof mascara, harsh products, and touching your lashes excessively. Use gentle cleansers and nourishing agents to keep your lashes healthy and defined.
Immediate Aftercare Instructions
Proper aftercare is essential to maintain the results of your lash lift. For the first 24 hours, avoid getting your lashes wet, as this can weaken the perm solution. Refrain from touching or rubbing your eyes, as this may cause the lashes to uncurl or become misshapen. Do not use waterproof mascara or harsh eye products, as they can damage the treated lashes. Gently cleanse your face, avoiding the eye area, and pat dry instead of rubbing. Avoid using oil-based products or castor oil, as they can interfere with the treatment. Sleep on your back to prevent lashes from flattening or twisting. By following these steps, you can ensure your lashes remain lifted and vibrant for up to 8 weeks. Proper care will help maintain the health and appearance of your lashes.
Long-Term Care Tips
To maintain the results of your lash lift, adopt a consistent care routine. Use a nourishing lash serum or oil to keep your lashes healthy and moisturized, as dry lashes may lose their curl faster. Avoid using waterproof mascara regularly, as it can damage the lashes and reduce the longevity of the lift. When cleansing your face, be gentle around the eye area to prevent disturbing the lashes. Avoid using harsh chemical-based products or exfoliants near your eyes. Refrain from touching or rubbing your lashes excessively, as this can cause them to uncurl or break. For long-term maintenance, consider touch-ups every 6-8 weeks to keep your lashes looking their best. By following these care tips, you can enjoy vibrant, lifted lashes for an extended period; Regular maintenance ensures your lashes remain healthy and retain their natural curl.
Products to Avoid After the Lash Lift
After a lash lift, it’s crucial to avoid certain products to maintain the results and protect your lashes. Waterproof mascara should be avoided, as it can weaken the lashes and reduce the longevity of the lift; Harsh chemical-based cleansers or exfoliants near the eye area can strip the lashes of their natural moisture and cause the curl to drop. Additionally, avoid using castor oil or any oil-based products around the lashes, as they can interfere with the lift and cause the lashes to uncurl. Instead, opt for gentle, oil-free cleansers and nourishing lash serums to keep your lashes healthy and moisturized. By avoiding these products, you can ensure your lashes remain lifted, healthy, and vibrant for a longer period. Proper care and product selection are key to maintaining the best results from your lash lift treatment.

Troubleshooting Common Issues
If lashes aren’t curling properly, check the perming lotion application and timing. For uneven results, reposition the silicone pads gently; Discomfort? Rinse with water and avoid harsh products.
What to Do If the Lashes Are Not Curling Properly
If your lashes aren’t curling as expected, check the application of the perming lotion. Ensure it’s applied evenly and avoid touching the lashes during the process. Proper timing is crucial—leaving the lotion on for too short or too long can affect results. Verify the silicone pad size matches your lash length; a pad that’s too small or large may prevent proper curling. Reapply the perming lotion if necessary, following the instructions carefully. If the issue persists, consider consulting a professional for guidance. Always follow the kit’s instructions precisely to achieve the desired lift and curl.
How to Fix Uneven Lashes
If your lashes appear uneven after a lash lift, start by assessing the application process. Ensure the silicone pads were placed correctly, with lashes evenly distributed over the pad. If some lashes are not adhering properly, gently reposition them while the glue is still tacky. Avoid touching the lashes excessively, as this can disrupt the perming process. After removing the pads, use a spoolie or micro brush to comb through your lashes, ensuring they are aligned and separated. For persistent unevenness, a follow-up application of the perming lotion may be necessary. Always refer to the kit’s instructions for proper technique, and practice gentle handling to achieve a balanced, natural look. Regular maintenance and proper aftercare can also help maintain even, lifted lashes.
Addressing Any Discomfort or Irritation
If you experience discomfort or irritation after using a lash lift kit, stop the process immediately and rinse your eyes with clean water. Gently flush the area to remove any residual product. Apply a soothing agent, such as aloe vera gel or hydrocortisone cream, to calm irritation. Avoid rubbing your eyes, as this can exacerbate discomfort. If redness or itching persists, discontinue use of the kit and consult a professional. Ensure all products are removed thoroughly with an oil-free cleanser. Avoid using harsh eye products or makeup for at least 24 hours. If irritation is severe, consider patch testing the kit’s ingredients on a small area before future use. Always follow the kit’s instructions carefully to minimize the risk of discomfort. Proper aftercare can help restore the health of your lashes and surrounding skin.
A lash lift kit offers a convenient, cost-effective way to achieve stunning, long-lasting results. Follow instructions carefully and maintain proper aftercare for the best outcome. Give it a try for a fresh, natural look that saves time on daily beauty routines.
Final Tips for Achieving the Best Results
To maximize your lash lift results, ensure proper preparation by cleaning your lashes thoroughly and avoiding oils or waterproof products beforehand. Always follow the kit instructions precisely, especially timing, to avoid under- or over-processing. Use the correct silicone pad size for your lash length to achieve the desired curl. Avoid touching or rubbing your lashes for 24 hours post-treatment to let the curl set properly. For long-term maintenance, keep your lashes moisturized with a nourishing agent provided in the kit. Consistency is key—repeat the process every 6–8 weeks to maintain the lifted look. Finally, avoid harsh products like mascara or eyelash curlers that could damage your lashes. By following these tips, you’ll enjoy vibrant, natural-looking lashes that frame your eyes beautifully. Remember, patience and careful application are essential for achieving professional-quality results at home.
Encouragement to Try the Lash Lift Kit
Taking the plunge with a lash lift kit can be transformative for your beauty routine. Many users rave about the convenience and impressive results, with kits offering a cost-effective alternative to salon treatments. The process is relatively quick, with results lasting up to eight weeks, making it a great option for busy individuals. Don’t be intimidated if you’re new to lash treatments—most kits are designed with beginners in mind, offering clear instructions and all necessary components. The satisfaction of achieving professional-quality lashes in the comfort of your home is empowering. Plus, the time saved from daily mascara application can be a game-changer. With proper care, your lashes will look healthy, lifted, and effortlessly glamorous. Give it a try and experience the confidence boost that comes with stunning, natural-looking lashes.